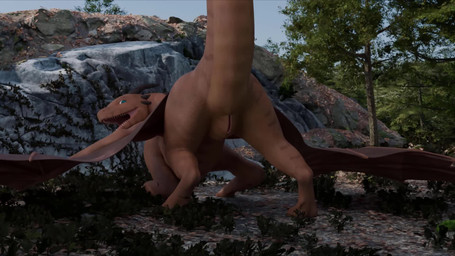
Description
I made this while learning blenders NLA tab. This was just a project to learn some new tricks so there are differing levels of quality in each shot.
[b]Please support blenders development fund so this amazing tool can get even better! Most 3d animations on here are made with it:[/b]
https://fund.blender.org
[b]Interceptor model by Jinnoaka, get it from their Patreon here:[/b]
https://www.patreon.com/jinnoaka
Jinnoaka's models are amazing and worth the price.
[b]Tammy model by dewith, support them on twitter or FA:[/b]
https://x.com/Dewith_
https://www.furaffinity.net/user/dewith/
[b]and get the tammy model here (FREE!!!) O:[/b]
https://mega.nz/folder/12dkTAQK#hnvmXY1xb2WF9P3i1DBlcA
If your reading this dewith, great model, probably the best free model out there, however there is a weird bug with the claws lagging behind by 1 frame and the hands bugging out every now and then. Baking the animation and offsetting it by a frame seems to work but I only thought of that after I spent 20 hours rendering );
For my fellow animators out there, here are a few tricks I learned while making this (I'm new to animating so most of this is for other newbies):
1. You can parent empties to 3 vertices and with bone constraints have bones "stick" to part of another model without hand animating it.
2. NLA tab is scary, but powerful. Only keyframe exactly what you need and keep actions as simple as possible, this makes it easier to stack actions reducing the amount of work you have to do.
3. Bake animations before rendering );
4. Learn how to use each and every bone constraint. Half of this animation was done procedually with bone constraints, with the internal shot being 100% procedual (I might release the .blend file just for that model as it is quite complicated to make.)
5. For tails do not hand animate them, you can get much better results using a procedual method. Here is how I did the tails for this animation:
Start by selecting the root tail bone ie "Tail.001" and make 2 custom properties in the bone tab, Name one TailFollowStrength and the other Dampening. On the next bone down ie "Tail.002" add a copy rotation and damped track bone constraint, set the damped track to target the next bone ie "Tail.003" and make a driver for its influence using the TailFollowStrength custom property. (Right click on the custom property and click copy as new driver). On the next bone down "Tail.003", you will add 2 damped tracks and optionaly another copy rotation. Set the first damped track again to the next bone "Tail.004" with the same driver, then set the second damped track to the previous bone "Tail.002" and make a driver with the Dampening custom property for it. You can then copy the constraints of this last bone all the way down the chain. Make sure each damped track is pointing to the next and previous bone. I recomend only using 2 Copy Rotations on the second and third bone, with decreasing influence. I Also recomend values of 0.75 for TailFollowStrength and 0.5 for Dampening. You can also use limit location/limit rotation and hand animation to animate collisions. You can also use this method for suspended arms/legs, however beware of mixing it with inverse kinematics, it can cause some unexpected results.
If I have the time, I might come back and polish this up.
[b]If anyone wants to add sound to this, feel free to do so[/b] and post it wherever you want, even for commercial use. Just link back to this post and give credit to jinnoaka, and dewith for the models and credit me as the animator. Please send me a copy if you do put it behind a pay wall. Im posting this under a CC BY-SA License.
- Rating
- E
- Score
- 1075
- Favorites
- 1777
- Comments
- 14
- Uploader
- Protonic
- File
- jpg 455x256
- Duration
- 122.056s